- South Western Sydney
and The Southern Highlands
- Mon - Sat 7am - 4:30pm
Emergency -Outside of this
- 0432 374 689 Call Team Penguin
How to Fix a Leaking Tap in Easy Steps
How to Fix a Leaking Tap in Easy Steps
Dripping taps are more than just an annoyance – they waste water, increase your bills, and can become a bigger problem if ignored. Fixing the issue is simpler than you might think and can help you save money while conserving water.
How to fix a leaking tap? It starts with understanding the basics. Most leaks come from worn washers, O-rings, or cartridges, all of which are replaceable with basic tools. In this guide, we'll walk you through the steps to fix a leaking tap, saving you time, money, and frustration.
Why Fixing a Leaking Tap Is Important
A leaking tap might seem like a minor inconvenience, but it's actually a big deal. Every drip adds up, wasting water and boosting your utility bills. It can also drive you up the wall with its constant, annoying sound. But there's more! Those small leaks can turn into major plumbing headaches if not fixed soon.
Ignoring a leaky tap isn't just a drain on your wallet. It's also a strain on the environment. Water is a precious resource, and even small leaks can waste gallons over time. Fixing them is a simple yet powerful way to contribute to water conservation.
Here's the good news: fixing a leaking tap doesn't have to be complicated. With a bit of guidance, you can tackle this as a DIY project. It's a great way to take control of your home plumbing and potentially save on repair costs.
Benefits of Fixing a Leaking Tap
Save Money
Reduce your water bill by stopping the waste.
Prevent Damage
Avoid larger issues that could lead to costly repairs.
Conserve Water
Help the environment by reducing water waste.
Peace of Mind
Enjoy a quieter home without the constant drip.
Taking action sooner rather than later can make a big difference. Roll up your sleeves and get ready to fix that leak!
Tools You Need for Tap Repair
To tackle a leaking tap, having the right tools and materials on hand is key. Here's a list to get you started:
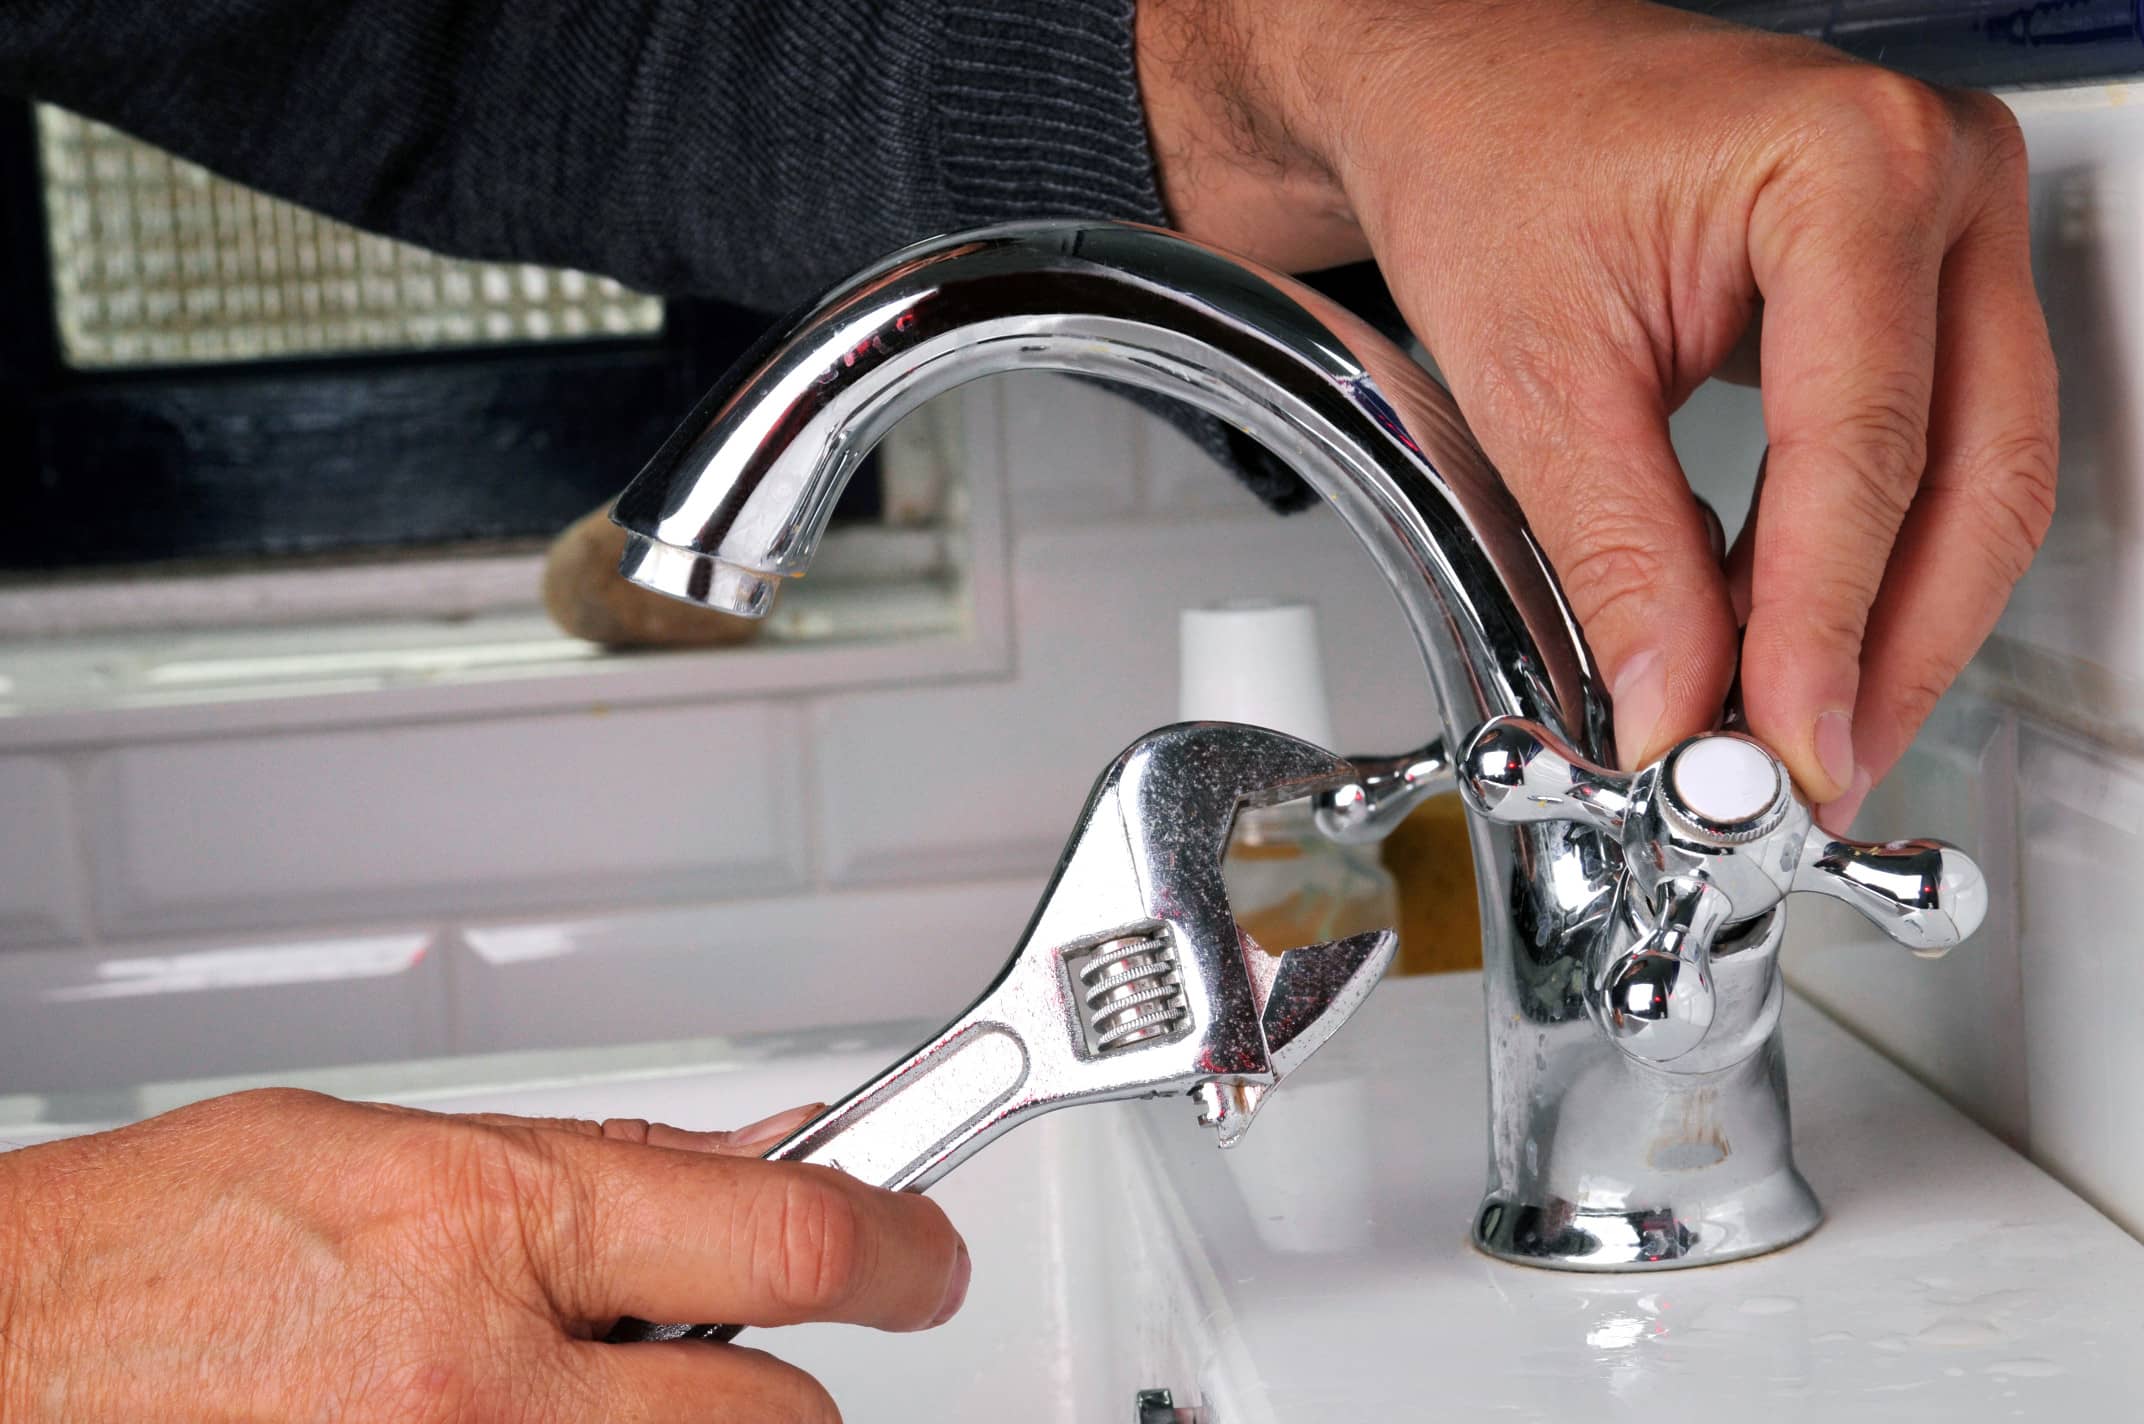
- Adjustable Wrench: Essential for loosening and tightening fittings.
- Cross-Headed Screwdriver: Needed for screws with a cross-shaped slot.
- Flat Head Screwdriver: Handy for flat-slotted screws.
- Plumber’s Tape: A must for sealing threaded connections and preventing leaks.
You might also need some replacement parts:
- Washers: Common culprits in leaks that need replacing.
- O-Rings: These provide a seal in faucets and might wear out over time.
- Cartridges: Some taps have replaceable cartridges that control water flow.
For more detailed insights on handling plumbing issues like leaking taps, you can explore our practical guides and insights on common plumbing challenges, which offer helpful DIY solutions.
Choosing the right tools is vital. Make sure your adjustable wrench fits comfortably in your hand and can handle different sizes. When picking screwdrivers, look for ones with a good grip to make the job easier.
Pro tip: Check your tap type beforehand, as some may require additional tools like a Hex Key or Allen Wrench. Gather everything ahead of time to avoid interruptions. This prep work ensures a smoother repair process and helps you finish the job without any hitches.
Step-by-Step Guide to Fixing a Leaking Tap
Fixing a leaking tap is easier than you might think. Follow these steps to get it done right.
Turn Off the Water Supply
Locate the shut-off valves under your sink and turn them off. This stops water flow while you work. If you can’t find them, turn off the main water supply.
Drain Remaining Water
Open the tap and let any leftover water flow out. This makes sure there’s no surprise splash when you start fixing.
Remove the Tap Handle
Use a screwdriver or hex key to remove the handle. Check for a decorative cap that might hide the screw. Once removed, keep the parts in order to make reassembly easier.
Inspect Internal Components
With the handle off, use a wrench to unscrew the valve or cartridge. Take a close look at the washers and O-rings. These are often the culprits behind leaks. If they’re worn, replace them with new ones.
Replace Faulty Parts
If you find any worn washers or O-rings, swap them out with the correct size replacements. Make sure they’re seated properly for a tight seal.
Reassemble the Tap
Carefully put everything back together. Start by aligning the new parts, then secure the handle with the screw or hex key.
Test for Leaks
Turn the water supply back on. Slowly open the tap and check for any leaks. If all looks good, congratulations – you’ve fixed it!
Following these steps ensures your tap functions smoothly. If you face any challenges, remember, Team Penguin Plumbing is here to help with all your plumbing needs.
Frequently Asked Questions
What causes a tap to start leaking?
Leaking taps are often caused by worn washers, O-rings, or seals. Over time, these components degrade due to regular use or water pressure. Sediment build-up can also damage internal parts, leading to leaks.
Can a leaking tap increase water bills significantly?
Yes, even a slow drip can waste hundreds of litres of water over time. This wastage adds up, leading to noticeably higher water bills if the issue isn’t addressed quickly.
How can I identify the type of tap I have?
Check for design clues like whether it has a single lever or separate hot and cold handles. Common types include compression, ball, ceramic disc, and cartridge taps, each requiring specific repairs.
Do I need to turn off the main water supply to fix a leaking tap?
Usually, you can turn off the shut-off valve located under the sink. However, if you can’t find it or it doesn’t work, turning off the main water supply is essential to avoid flooding.
What are the most common parts that cause a tap to leak?
Worn washers, damaged O-rings, and faulty cartridges are the main culprits. These parts handle water flow and pressure and can wear out due to age or improper installation.
How do I know if I’ve fixed the leak correctly?
After reassembling the tap, turn the water back on and test it. If no water drips when the tap is closed, and the flow is steady when open, the repair was successful.
When should I call a professional plumber for a leaking tap?
Call a plumber if the leak persists despite replacing parts or if you notice damage to the tap body. Professional help is also recommended for concealed or complex plumbing systems.
Key Takeaways for a Leak-Free Home
A leak-free home isn’t just about comfort. It’s about taking charge of your plumbing and avoiding unexpected disruptions. Using quality tools and replacement parts is important for a lasting fix. Those small investments can save you from bigger headaches later on.
Regular maintenance is your best friend. It keeps your plumbing in check and prevents future leaks. By staying proactive, you can dodge costly repairs and keep everything running smoothly.
Here’s a quick recap of what a leak-free home brings:
- Long-Term Savings: Preventative steps help avoid major repairs and high bills.
- Environmental Impact: Conserves water, supporting sustainability efforts.
- Home Comfort: Enjoy peace and quiet without the dripping sound.
If you’ve followed the steps and the leak persists, it might be time to call in a professional. Sometimes, those stubborn leaks need expert eyes to spot deeper issues.
Keeping your plumbing systems in top condition is all about being vigilant and addressing problems early. It’s the smart way to ensure everything in your home stays in tip-top shape.
Say Goodbye to Dripping Taps with Team Penguin
Fixing a leaking tap isn’t as daunting as it might seem, and with this guide, you’re well on your way to mastering it yourself. However, some leaks require professional expertise to get to the root of the issue and prevent further damage. Don’t let a small problem turn into a big expense!
Team Penguin Plumbing is just a call away for fast, reliable service. Whether it’s a leaking tap or a full plumbing emergency, we’ve got you covered. Contact us today at 0432 374 689 or visit our website to book a service.